
High quality photos are tangible proof of your business’s expertise and successes.
For example, before-and-after photos showcase real examples of completed projects; they’re visual evidence of what you can achieve for new and existing customers.
Relying on stock images is a no-no when it comes to building a solid online reputation and boosting conversions; you need actual, high-quality images of your team, equipment, jobs in progress, and completed projects.
Using these images on online marketing channels like your Google Business Profile shows prospects you’re a real business with real customers (rather than just telling them about how long you’ve been in business or services you offer.)
This visual proof increases your chances of earning potential customers’ trust, receiving more service requests, and driving organic traffic to your website, according to Google.
“Businesses with photos are more likely to receive requests for driving directions to their location, as well as clicks through to their websites, than businesses that don’t have photos.”
But we understand not everyone knows how to take high quality photos without the help of a professional photographer or can afford to hire one (or buy a high-end DSLR).
That’s why we put together five DIY tips for taking high-quality pictures using equipment you already have (or with a small investment to buy budget-friendly options).
This way, you’ll have a portfolio of high-quality visuals to use on your HVAC marketing channels, which will help you build trust with prospects and eventually win them over.
Table of Contents
Step 1: Identify the types of photos to use on each channel
Not all photos work on different digital marketing channels—you should choose the right type of photos for each platform to maximize their impact.
For example, the best types of photos to add to your Google Business Profile include:
- Job-in-progress photos to show the work being done
- Team photos to introduce your team to potential customers
- Completed project photos to highlight the quality of your finished work
- Exterior photos to help new customers recognize your business location
These types of photos showcase aspects of your business that customers consider when choosing between you and local competitors.
Action shots (showing your team members installing or repairing HVAC systems) work best for social media platforms like Facebook. Using these photos on Facebook increases the chances of more people engaging with your post.
That’s why you should prioritize taking clear, high-resolution images for different marketing channels.
What kind of images can you use in your HVAC marketing channels?
Before choosing the kind of photos to take, identify your primary marketing channels where you plan to use these photos.
The most popular sources where homeowners find HVAC companies to hire include:
- Your Google Business Profile
- Google Ads and Local Service Ads
- Your website’s homepage, service pages, and photo gallery
- Social media platforms like Facebook, Instagram, and Pinterest
Below, we outline five images to add to your shot list and where to use them.
1. Before-and-After Photos
These photos show the condition of a unit before your team fixed it and what it looks like after the job is completed, like this example from JFK Heating and Cooling:
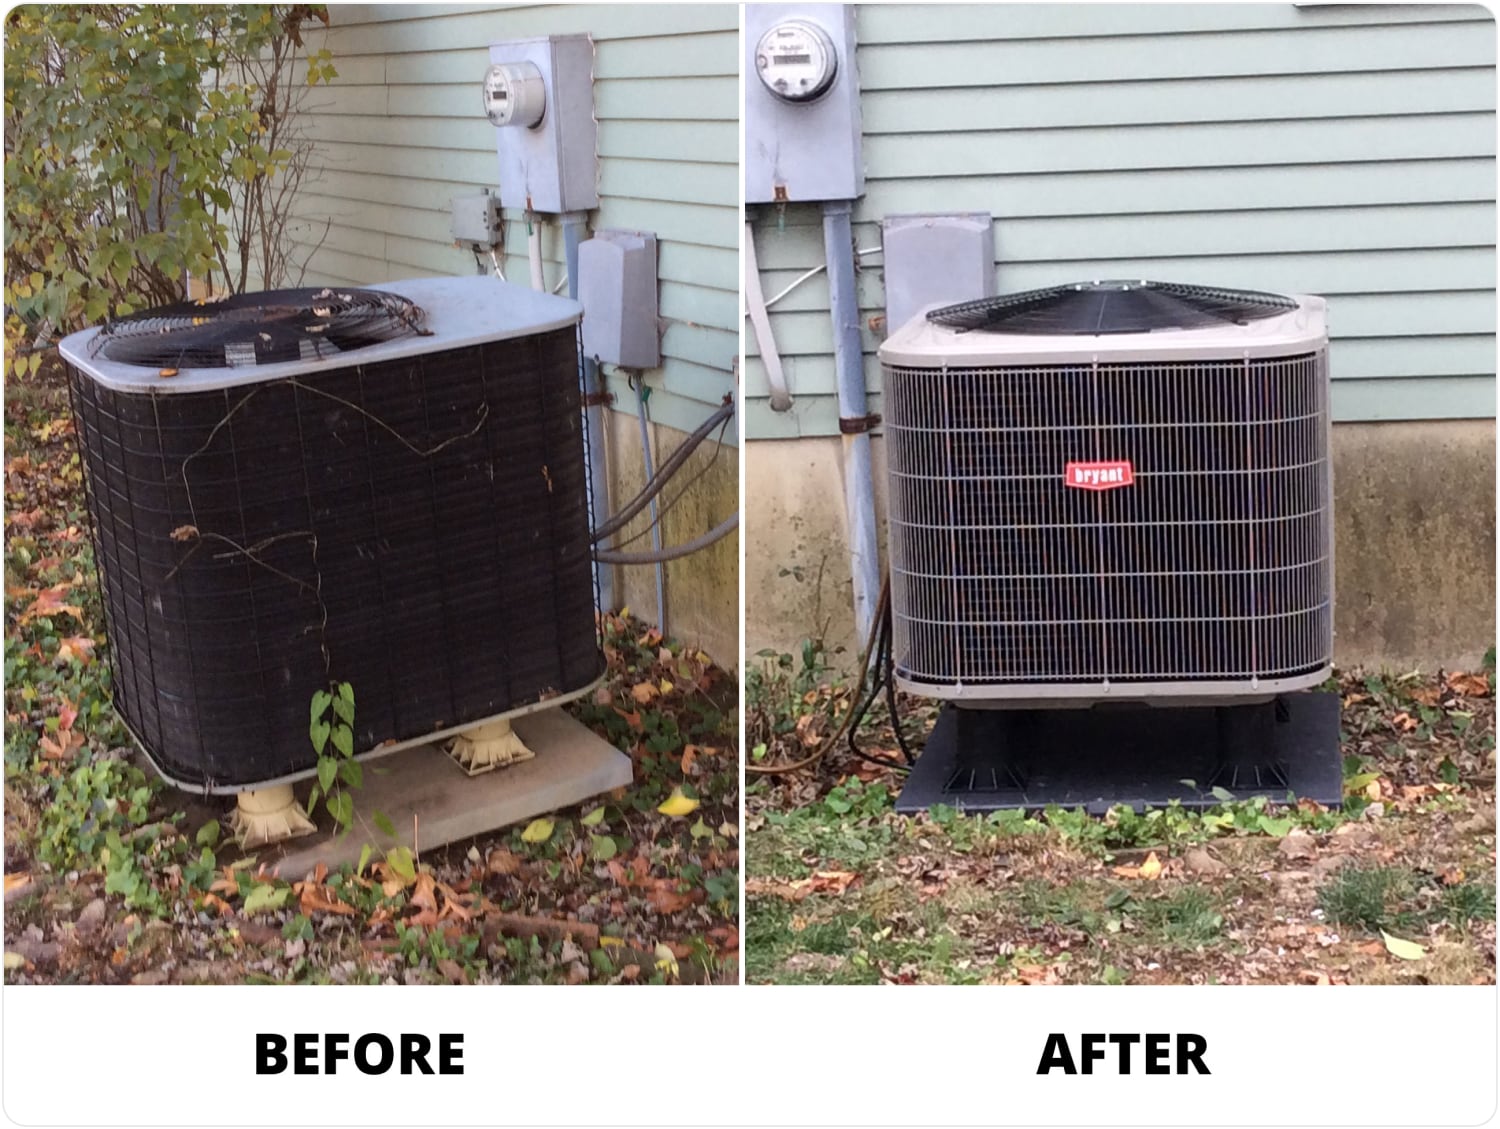
The “before” photo shows the state of the AC unit before service was performed, highlighting issues like dirt, wear and tear, and outdated equipment.
The “after” photos showcase the results of the work done—a newly installed system and overall improved environment.
They showcase real examples of your work, positioning you as an expert contractor and helping you build trust with potential customers.
Use these photos on Facebook to reach those already following your page (and more people if you decide to run HVAC ads), like Horne Heating and Air Conditioning Inc did.

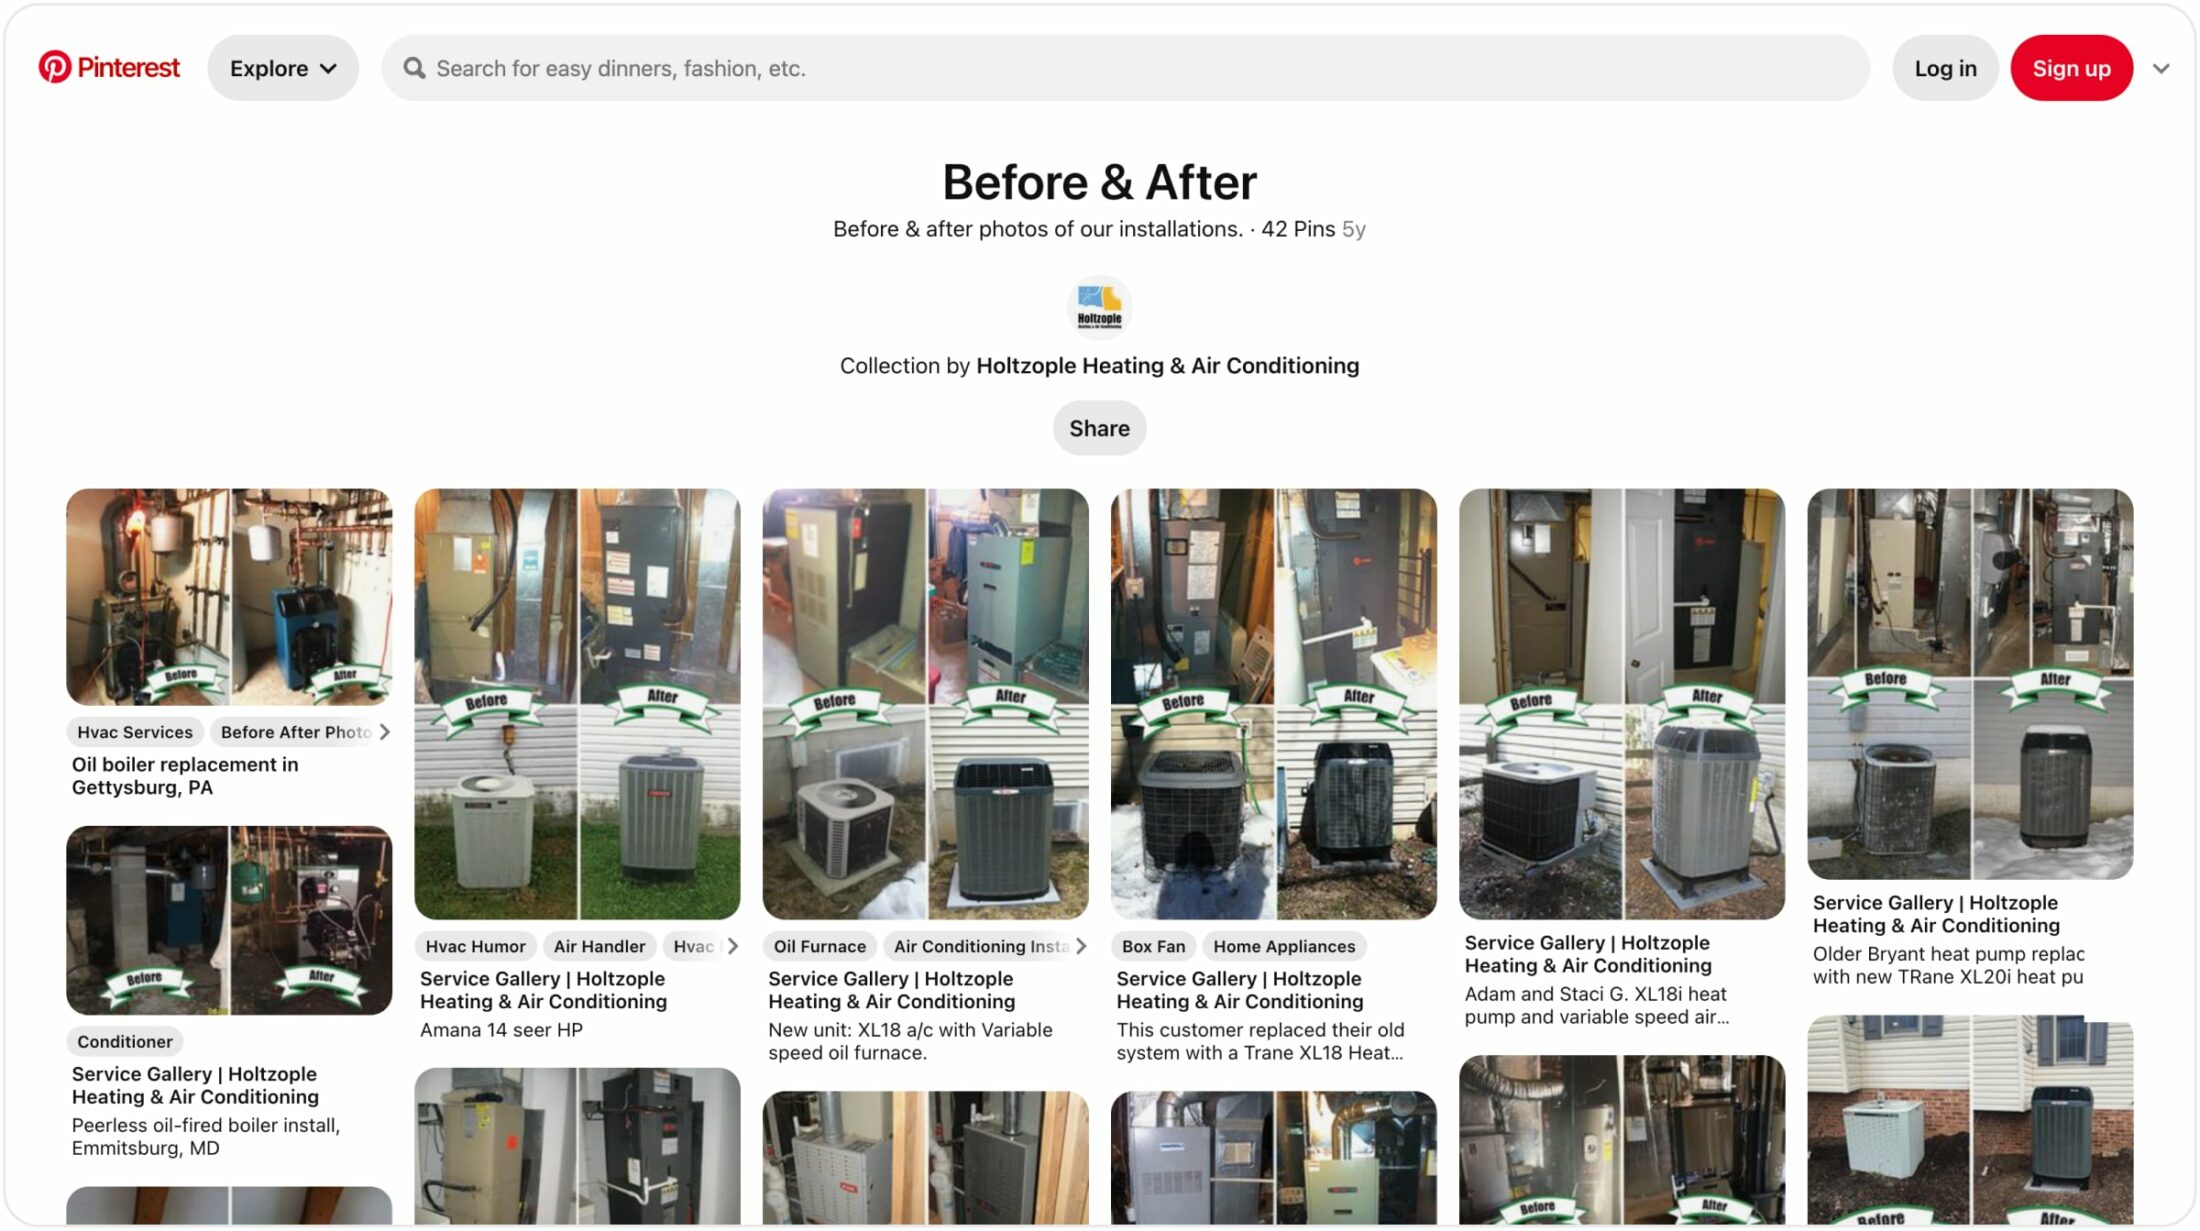
You could also use these photos on Pinterest.
The platform has more than 518 million monthly active users who use the channel to find information about products and services.
(Not to mention that many of them are homeowners).
Create boards with your “before and after” photos to attract potential customers looking for HVAC solutions, like Holtzople Heating & Air Conditioning.
You could also include them in your gallery page, blog posts, sales enablement content, and landing pages on your HVAC website.
2. Job-in-Progress Photos
These photos are taken during the various stages of the HVAC project to show your team actively working on HVAC installations or repairs in real-time.
For example, this image from All Star AC & Heating Services gives a sneak peek into the steps taken to achieve the final result (a well cleaned and serviced outside AC unit).

You can use images like this on your:
- Google Business Profile (like One Hour Heating and Air Conditioning does)
- Instagram posts, stories, and highlights
- Facebook posts
3. Team Photos
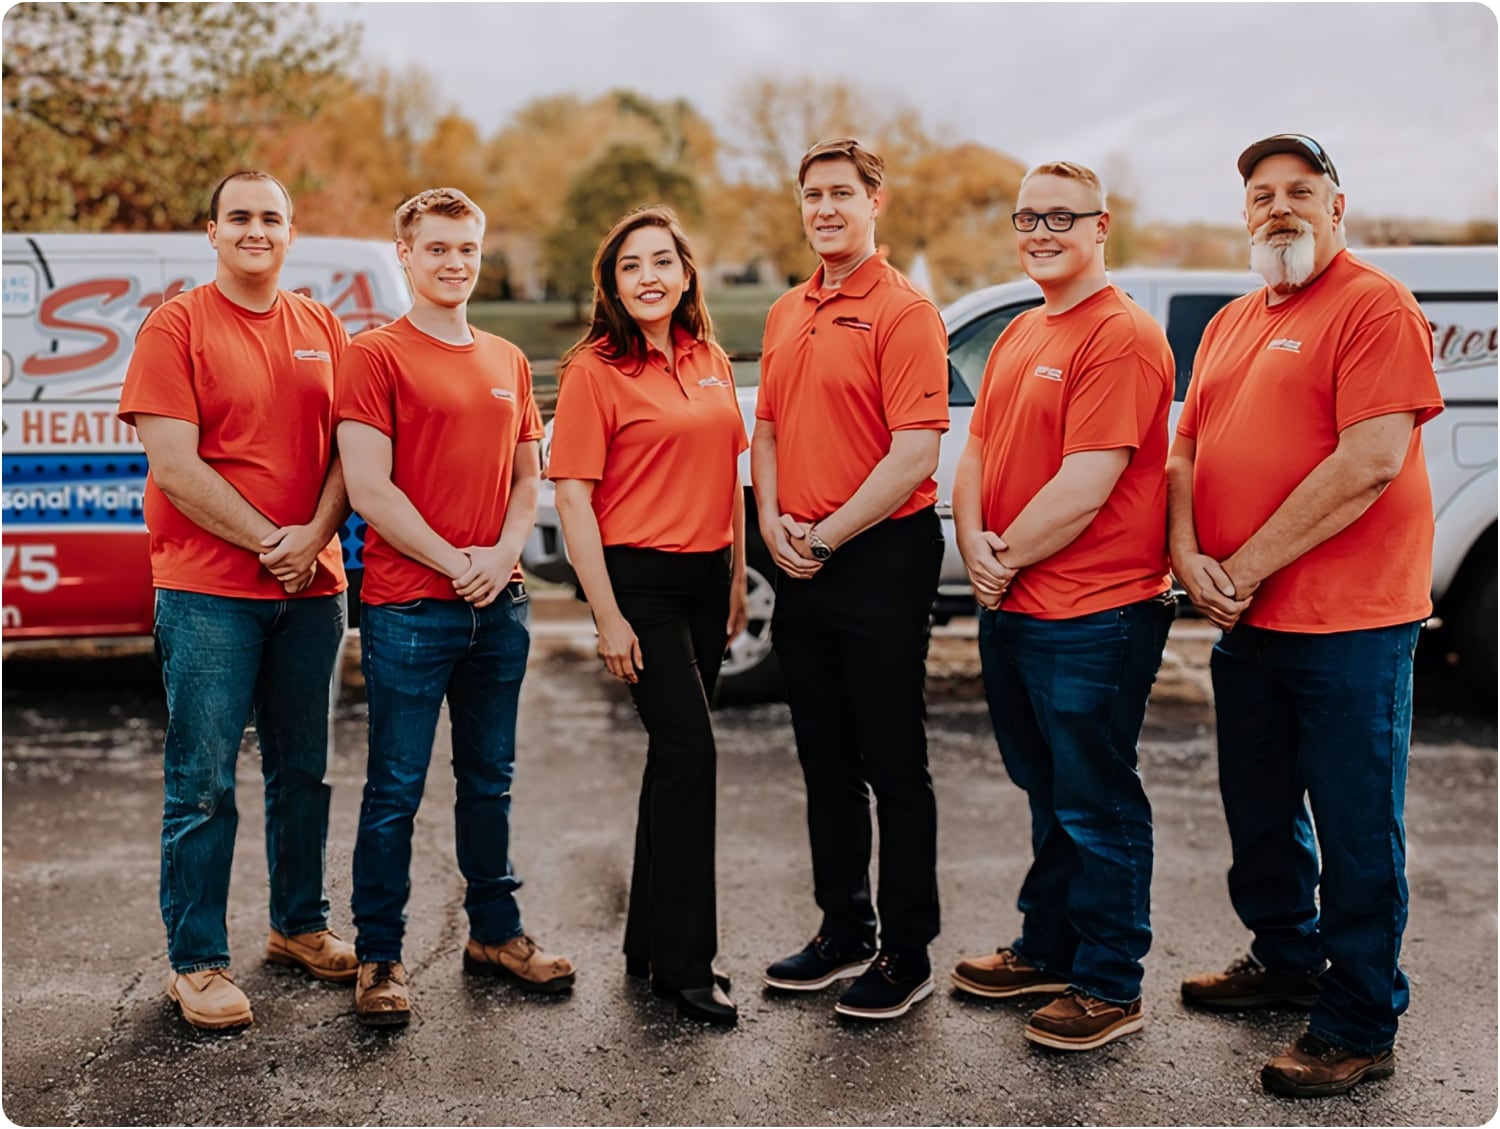
Pictures of your team help to humanize your brand—they allow potential customers to see the faces behind your business.
These images are usually taken in various settings, such as at the office, during training sessions, local events, or while working on a job site. Or in front of your office or branded vehicles like this one from Steve’s Heating and Cooling.
Use team photos on your:
- Home Page to make a strong first impression
- About us page to introduce your team members with individual photos and brief bios, so potential customers get to know your staff
- Google Business Profile to show the human side of your business and improve local SEO
4. Completed Project Photos
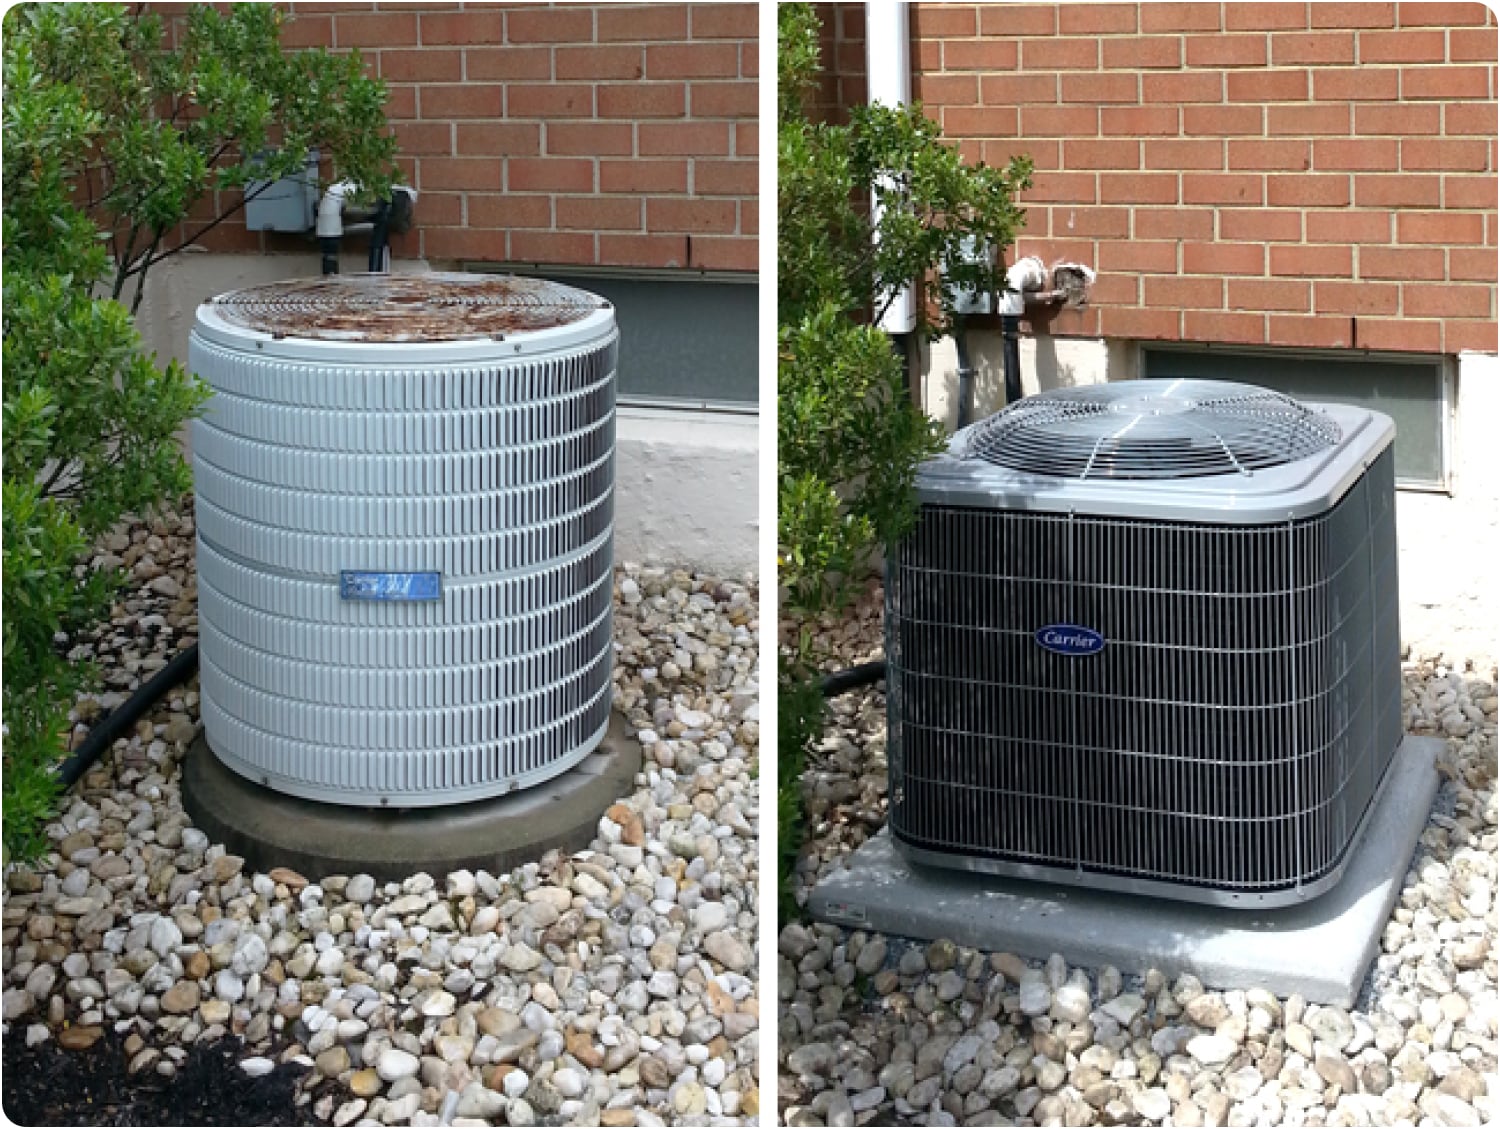
Completed project photos are images taken after the successful completion of an HVAC project, showcasing the final result of your work.
They give prospects a clear idea of what to expect from your services, like this example from Hiller Plumbing, Heating, Cooling & Electrical.

Use completed photos on your:
- Google Business Profile
- Gallery page or in case studies on your website
- Social media platforms like Facebook, Instagram, and Pinterest
Pro Tip: Ask customers to include images along with their reviews.
Offer to take the photos on their behalf at their location (after a successful job completion) and share them so they can include them in their reviews.
Photos from real customers are perceived as more authentic and trustworthy than professional photos. They show potential customers that others have had positive experiences with your business, which improves their trust and confidence.
Plus, these reviews and photos are often posted from the customer’s home, so they’ll likely include metadata such as geotags.
The location data embedded in their review helps Google understand where your satisfied customers are located.
And if more customers from your service area leave reviews, Google associates your business with that location, signaling that you are relevant to searches in that area.
That helps to boost your rankings in Google Maps and local search results.
5. Office and Vehicle Photos
Office and vehicle photos showcase your HVAC company’s physical premises, branded vehicles, and staff at the workplace.
They illustrate the size and capacity of your business, helping to reassure potential customers of your ability to handle projects at scale and fast.
Plus, including your company’s logo and other branding elements (like company colors and slogans) on your vehicles and office signage helps create a consistent and recognizable image for your business.
Take Hiller Plumbing, Heating, and Electrical, for example.
The company has done a great job reinforcing its brand identity through high-quality photos that consistently features its happy face emoji branding across all physical assets.

This consistency helps customers remember and recognize Hiller’s brand more easily.
Use these images in your digital (and printed) brochures, website (about us and contact page), Google Business Profile, and social media.
Step 2: Get the equipment you need for the shoot
Before you start taking photos, it’s important to have the right equipment to ensure they’re professional and visually appealing.
You don’t need to invest in expensive gear like a high-end DSLR (unless you can afford it); budget-friendly options, like your smartphone, can still deliver high-quality photos.
What are the basic equipment do you need to take high quality photos?
1. Smartphone with a Good Camera
Budget smartphones, such as the iPhone SE, Google Pixel 7a, or Samsung Galaxy A54, have good cameras capable of taking high-quality photos, which cost below $500.
If you can afford higher, go for iPhone 13 or 13 Pro.
They offer even better camera quality, which is particularly beneficial if you offer 24/7 HVAC services and need to take photos in varying lighting conditions.
Plus, you can go for the refurbished iPhone 13 and 13 Pro Apple sells.
There are also affordable digital cameras you could consider investing in, such as
- Canon rebel (T2i, T3i/T4i, and T5i)
- Nikon (D3200, D3300, D5100, D5200, D5300, and D7000)
You can source these (as well as a kit lens) from your local Craigslist.
2. Tripod
When taking photos, especially in low-light conditions, the camera’s shutter speed needs to be slower. You also need longer exposure to allow more light to reach the sensor.
Holding the camera by hand can introduce small shakes that cause blurry images.
A tripod keeps the camera steady during these longer exposures, resulting in clear, well-lit photos without any motion blur.
Plus, even during the day or at night, you can:
- Place your phone on the stand and set timers to capture you while working
- Set up your camera at a specific angle and height, which is helpful for before-and-after photos, ensuring the two images accurately compare
One of the best affordable tripod on the market for cameras is the SLIK Sprint PRO III. Customers love the tripod because it is sturdy, lightweight, and easy to place in a backpack.

For smartphones, K&F Concept Tripod is a great choice. Customers love how easily adjustable it is, its portability, and ease to set up.

Other options you could consider that are below or a little above $100 are:
- Joby Compact Advanced (for cameras and smartphones)
- Manfrotto Element MII Aluminum (for cameras)
- GEEKOTO 77’’ Tripod (for cameras)
3. Lighting
Portable LED lights or ring lights can help illuminate the subject, capturing the true colors of the subject. This way, equipment and surroundings appear exactly as they are. Neewer 18-Inch Ring Light is one of the best affordable lights under $100 you could consider. The light is compatible with smartphones and cameras.

Customers love the ring light because of its adjustable brightness and dimmer feature as well as its affordable price.
This kit includes an 18-inch ring light, adjustable brightness, color temperature control, a stable tripod, and multiple filters. It also comes with a carry bag for easy transportation. RALENO LED video soft light panel is another affordable option to consider.

This light panel offers adjustable brightness and color temperature. Plus, it’s lightweight and comes with a built-in battery that lasts a long time.
4. Reflectors
Use a reflector to bounce light from a window or light source onto the HVAC unit.
It helps distribute light evenly across your subject, reducing harsh shadows and highlighting details more clearly.
On a sunny day, reflectors bounce sunlight onto the HVAC unit and reduce shadows cast by direct sunlight. They also brighten the subject when natural light is less intense. Neewer 5-in-1 light reflector is an affordable option to consider buying.

It includes five surfaces (gold, silver, white, black, and translucent) for various lighting needs and costs a little above $30.
Other budget options to consider include:
Step 3: Set up your shots
Positioning your camera or smartphone and other equipment the right way improves your chances of taking high-quality photos.
This helps you control lighting to avoid harsh shadows, overexposed highlights, or dark areas that could affect the quality of your photos.
How to set up your shots
1. Choose the Right Location
The right location depends on the kind of photo you want to take and the time of day.
For example, team photos are best taken near branded elements (like company vehicles) late afternoon when the sunlight is warm, making the photos look more natural.
For a team indoor shoot, positioning everyone near large windows or using lights (like the ones we recommended above) ensures even lighting.
We created the table below to help you know the right location and time of day for different types of photos.
| Photo type | Location | Time of day |
|---|---|---|
| Team Photos | Near branded elements like company vehicles | Late afternoon when the sunlight is warm. If your team opts for an indoor shoot, position everyone near large windows or use lights (like the ones recommended above) to ensure even lighting. |
| Before-and-After Photos | Where the HVAC unit is installed | Early morning or late afternoon for outdoor shots to utilize soft, even natural light. For indoor shots, midday works well if there is ample natural light or good artificial lighting. |
| Job-in-Progress Photos | Active work sites such as basements, attics, or wherever the faulty or new unit is | Midday for indoor sites with natural light through windows. Use portable lighting for consistent illumination in areas with poor natural light. |
| Completed Project Photos | Customer’s home or business where the HVAC system is installed | Early morning, late afternoon, or midday with controlled indoor lighting to highlight the installation. |
| Office and Vehicle Photos | Office interiors, parking lots, or near branded signage. | Morning or late afternoon for outdoor shots to avoid harsh shadows. Indoor shots can be taken anytime with proper lighting. |
2. Set up the scene
For before-and-after photos,
- Remove any tools, debris, or unnecessary items around the HVAC unit
- Set up your camera or smartphone on your tripod and position it at a height and angle that captures the entire unit
- Mark the spot where the tripod is placed to ensure you can replicate the shot for the “after” photo
- Return at the same time of day the before photo was taken for the after photo, then set up the camera in the marked spot and use the same angle and height
- Clean the area around the HVAC unit again if necessary before taking the shot
- Make sure all the changes and upgrades on the unit are clearly visible
Here’s a good example of a before-and-after photo from Burkholder’s Heating & Air Conditioning, Inc. that checks all boxes above
For job-in-progress photos:
- Take photos of team members actively installing, repairing, or maintaining HVAC systems
- Ensure the work area is tidy and the equipment is visible
- Use portable LED lights to illuminate the work area evenly, especially in dimly lit spaces like basements or attics
- Take photos from various angles, including wide shots of the entire workspace and close-ups of specific tasks
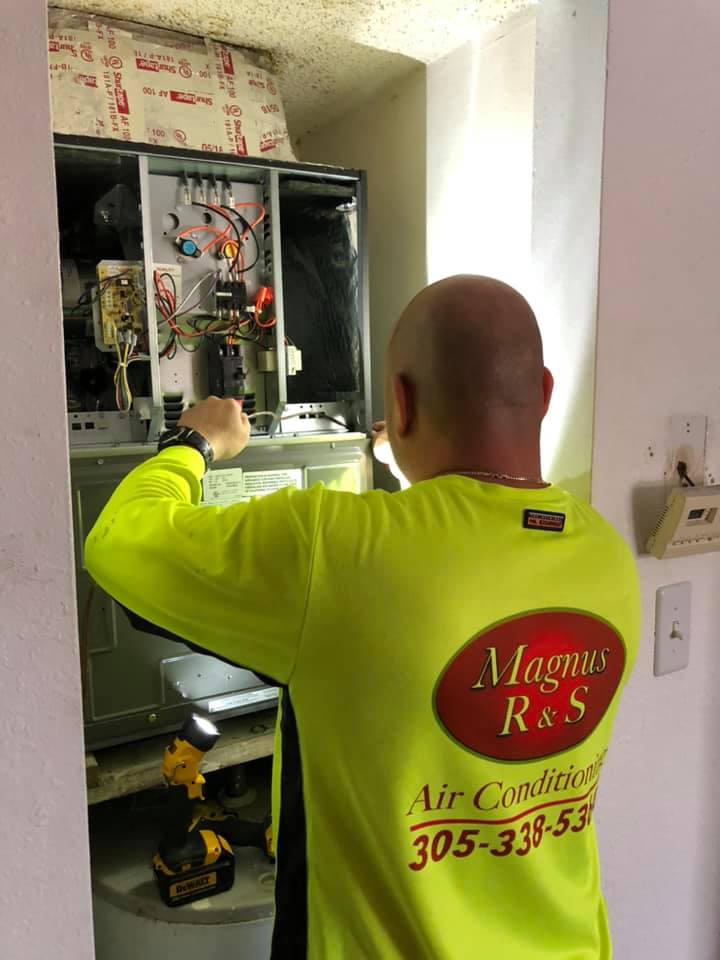
Here’s a good example of a job-in-progress photo from Magnus R&S Air Conditioning:
For team photos:
- Use neutral-colored backgrounds or use the portrait mode on your smartphone to blur out the background for indoor photos. For outdoor photos, use branded elements like company vehicles or a neutral color wall as your background
- Place the tallest individuals in the center or use steps or chairs to ensure everyone’s face is visible
- Arrange the group in rows, with the back row standing, the middle row sitting or kneeling, and the front row sitting on the ground or on chairs if needed (optional)
- Ensure there is equal space between each person to make the photo organized
- Ask everyone to smile and look at the camera while doing so
Like this image of Chad Love Services’ team:

3. Camera or Smartphone
To help you set up your smartphone for the best results:
- Wipe the lens with a soft, clean cloth
- Go to your camera settings and enable grid lines—they help you compose your shots using the rule of thirds

- In your camera settings, set the resolution to the highest possible setting (use this guide to change your iPhone camera settings, if you use one)
- Tap on the subject on your screen to focus and adjust exposure by sliding your finger up or down to increase or decrease exposure
- Enable HDR (High Dynamic Range) mode if available to captures more detail in both the shadows and highlights
For camera:
- Use a lens cleaning cloth to gently clean the camera lens
- Turn the mode dial to Auto—it automatically adjusts the settings for optimal exposure and focus
- Set the mode dial to Aperture Priority (A or Av) to control the depth of field, which gives a blurred background effect while keeping the subject in sharp focus.
- Set the ISO to a low value (e.g., ISO 100-200) for bright conditions and higher (e.g., ISO 800-1600) for low-light conditions
- Choose the appropriate white balance setting for your lighting conditions (e.g., Daylight, Cloudy, Tungsten)
- Use the camera’s autofocus to lock focus on your subject and compose your shot using the grid lines in the viewfinder or LCD screen.
4. Position your tripod
For indoor shoots, place the tripod in front of the workspace or where you choose to take the photo. Then adjust the height to eye level.

For outdoor shoots, set the tripod on stable ground in front of the vehicle or the object, and adjust the height to capture the entire vehicle. Use this video as a guide to learn how to set up and use your tripod stand.
5. Position your lights
To properly position your lights,
- Place your lights at a 45-degree angle to your subject
- If using natural light, position your subject near a window. This setup provides even lighting and reduces harsh shadows
- Use the dimmer settings on your lights to adjust the brightness. Start with medium intensity and adjust as needed
- If the light is too harsh, use a diffuser or white cloth to soften it
6. Position Reflectors
Place reflectors opposite your main light source to bounce light onto your subject. You can use a white, silver, or gold reflector depending on the desired effect.
Tilt the reflector to direct light onto the shadowed areas of your subject to ensure even lighting and enhance details.
Some additional tips to keep in mind just before you shoot:
- Schedule shoots during the golden hours (early morning or late afternoon) when natural light is soft and warm
- Midday sun can create harsh shadows and overexposed areas. If shooting at this time is necessary, use diffusers or reflectors to manage the light
- Use portable LED lights or reflectors to fill in shadows and provide balanced lighting, especially in shaded areas
- Position the camera to take advantage of the best lighting angles. Keep the sun behind or to the side of the camera to avoid backlighting and lens flare
- For outdoor shoots, always check the weather forecast to avoid unexpected rain or harsh conditions
- Ensure all your equipment is fully charged and ready to go. Bring extra batteries and memory cards
- Take test shots to check lighting, composition, and equipment settings before starting the main shoot
- Be flexible and ready to adjust your equipment and positioning based on the environment and lighting conditions
If you want to learn more about how to optimize light and set exposure to take high-quality images, check out this photography course.
Step 4: Edit to get more high-quality photos
Even with the best equipment and setup, photos can have minor flaws like dust spots, blemishes, or unwanted elements.
Editing allows you to correct these imperfections and enhance your images.
How to edit your photos to improve their quality
Choose the right editing software, depending on your budget and expertise. Use free tools like Adobe or Canva online photo editor.
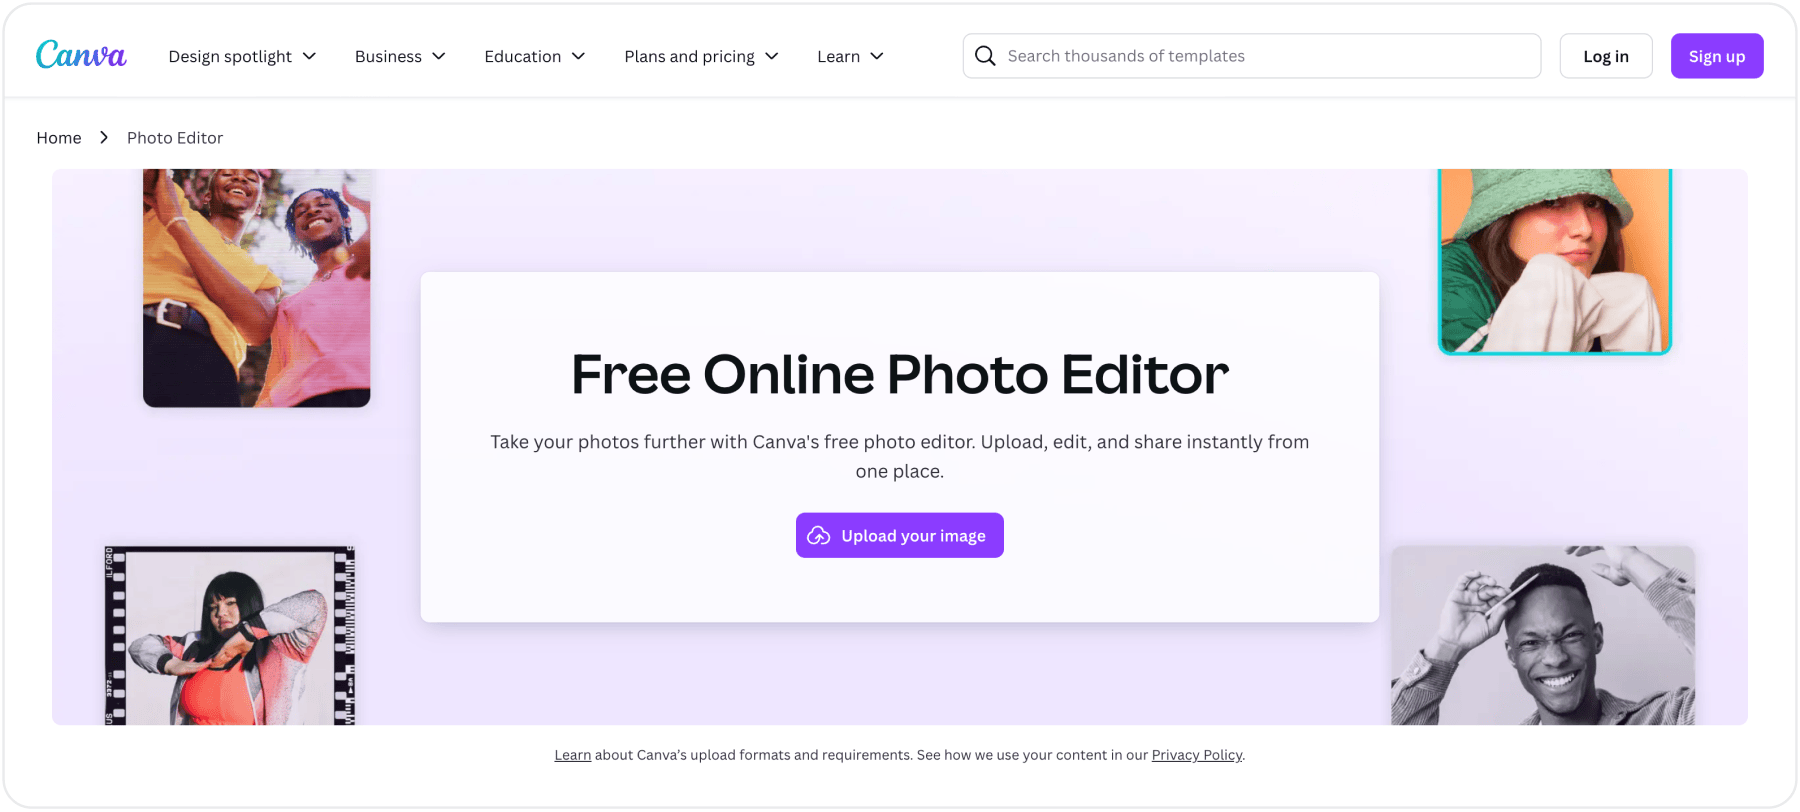
To use Canva, click on “upload your image” to get started. You can only upload up to 5GB of media as a free user.
Once uploaded, you can:
- Use the crop tool to remove unnecessary elements and straighten the image
- Select “Adjust” from the toolbar and use the sliders to adjust brightness and contrast
- Use the saturation and tint sliders to enhance the colors in your photo
- Use the warmth slider to adjust the white balance and ensure the colors look natural
- Use the “Edit” tab and select the “Remove background” tool or the “Magic Resize” feature to remove any imperfections or unwanted elements
If you want a step-by-step guide on how to use Canva to edit your photos, read this guide. But if you prefer Adobe, read this guide.
Step 5: Format photos for different marketing channels
Different marketing channels have specific requirements for image dimensions, file sizes, and formats. Understanding them helps you optimize your photos accordingly.
While taking and editing your photos, keep these dimensions in mind:
Google Business Profile
- Recommended Dimensions: 720 x 720 px (minimum), up to 1024 x 1024 px
- File Size: Up to 5 MB
- Format: JPG or PNG
Website
- Homepage Banners: 1920 x 1080 pixels or larger, depending on your site design
- Service Pages: 1200 x 800 pixels
- Gallery/Portfolio Pages: 800 x 600 pixels or larger
- File Size: Optimize for web to reduce loading times, ideally under 1 MB
- Format: JPG for photos, PNG for images with transparency
- Profile Picture: 180 x 180 pixels
- Cover Photo: 820 x 312 pixels
- Shared Images: 1200 x 630 pixels
- File Size: Under 100 KB for faster loading
- Format: JPG or PNG
- Profile Picture: 110 x 110 pixels
- Square Image Post: 1080 x 1080 pixels
- Portrait Image Post: 1080 x 1350 pixels
- Story: 1080 x 1920 pixels
- File Size: Under 100 KB for faster loading
- Format: JPG or PNG
- Pin Image: 1000 x 1500 pixels (2:3 aspect ratio)
- File Size: Under 2 MB
- Format: JPG or PNG
Take high quality photos, but optimize them for local SEO
High-quality photos create a positive first impression and reduce user friction.
They make your website, social media, GBP, and other online listings look professional, showing potential customers you’re a real business with real customers.
But these images also impact your rankings on Google Maps and local organic results. Up to 90% of potential customers are more likely to hire businesses with photos than those without pictures.
Plus, search engines like Google show relevant images to searchers, so optimizing photos increases your chances of ranking for local search queries.
To optimize your images (particularly those going on your website):
- Use descriptive, keyword-rich file names (e.g., “hvac-installation-new-york.jpg”)
- Write alt text that includes relevant local keywords (e.g., “HVAC maintenance service in New York”)
- Use location-specific or geo-targeting keywords in captions and descriptions
- Compress images to ensure they load quickly without sacrificing quality
Want to achieve boost your local SEO? We’re a data-oriented partner available to help you rank higher on Google Maps and organic results, so you have more inquiries and appointment bookings. Book a free consultation.
FAQs About Taking Quality HVAC Images
How do I get the best quality HVAC image?
To take high-quality HVAC images
– Get a modern smartphone with lenses and exposure options.
– Use natural lighting by shooting images at mid-morning or an hour before dusk
– Apply the rule of thirds using gridlines
– Focus on the subject and place the camera or phone on a tripod to avoid blurs
– Try different angles and pick the best
– Increase or decrease exposure settings based on how much light is available
What is the difference between good and bad HVAC images?
Good HVAC images have a clear subject (a person, group of people, or equipment), good composition, and convey a clear message. Bad HVAC images, on the other hand, are cluttered with distracting elements, blurry, poorly lit, and visual appeal.
How can I take the best HVAC pictures with a smartphone?
To take good HVAC pictures with a smartphone:
– Clean your phone’s camera lens
– Ensure your subject is well-lit with natural light (mid-morning or an hour before the sun sets) or artificial light.
– Lock in your focus
– Avoid using the digital zoom as it can reduce the image quality.
– Compose images better with grid lines
– Use High Dynamic Range for low-light scenarios
– Use portrait mode to blur cluttered backgrounds-
– Shoot in RAW format to get high-resolution images
– Use a tripod to keep your hands steady